Posts

Introduction to 12d Model 14

Earlier this week, we ran a webinar – ‘Introduction to 12d Model 14’ – which was presented by our co-founder and Managing Director, Dr Lee Gregory, who has 39 years of experience in the civil software industry. Lee is a founding member of the Open BIM Alliance, and a member of buildingSMART.

In 12d Model 14, we’ve updated the menu structure, and streamlined a lot of processes, thanks to user feedback. This will be a vast improvement in the long run, but we understand changes can take some getting used to. To this effect, Lee walked us through some of the changes, to help the switch to 12d Model 14 to be made with ease!

Lee looked at some of the general features that you’ll first notice when using 12d Model 14. Over the coming months, we will run webinars offering a detailed look at the major 12d Model 14 options. 12d Model 14 is undergoing continuous development, and sub-versions are regularly released with both bug fixes and new functionality.

12d Model 14 Release Sequence

  • 12d Model Beta Forum
  • 12d Model Forum
  • Update checker turned on
  • Posted on www.12d.com

The latest released version is 12d Model 14 C2b, and we are currently working on 12d Model 14 C2c. Lee used images from 12d Model 14 C2c.

New Menu Structure in 12d Model 14

Introduction to 12d Model 14
New Menu Structure – 12d Model 14

Drainage-Sewer Replaced by Water

  • Node replaces pit/maintenance hole
  • Link replaces pipe

New BIM and Volumes menus.

How to Find Options

  • Upgraded Search for 12d Model Options
  • Now searches menus and most panels
  • If spaces between entered words:

searches for items with all the words

  • If commas:

searches for any of the words

  • Horizontal and vertical sliders

Project Settings

  • Settings that are saved with the project
  • Replaces Defaults etc.
  • Turn Super Inquire on/off
  • Set Inquire Style
  • Copy Inquire information to clipboard
  • Autosave screen layout – saves most menus and panels on Exit so they appear when you start up again.

User Defined Menus

In 12d Model 14, Users can define their own menu structure to replace the shipped 12d Model Menu. There will be a ‘magic button’ to restore the original menu structure if needed (in particular for Support).

Water

  • Drainage Analysis – Australian Rainfall and Runoff 2016
  • Extended pits for Water string
  • Risers for Water string
  • User defined house controls

Multipage Plots

  • A total rewrite of MPS for V14
  • “sheets” is no longer used
  • It is V12 MPS on steroids
  • 12d Model 14 “MPS” is displayed as a tree with three levels – Book, Chapter, and Page

The hierarchy of Book, Chapter and Page allows items such as Frames, Text, Title blocks, Symbols and Models to be defined at the Book or Chapter level, and have them automatically apply to all the Pages in the lower levels.

Plus

Any of these can be overridden for a Chapter and/or Page.

  • There are new types of frames to draw on a page
  • And Referencing makes overriding a breeze.
  • There are Special Chapters which allow you to include any number of pages from
  • And of course the MPS text variables $current_page and $total_pages automatically adjust for the special chapters.

Documentation

  • What’s New in 12d Model 14 Summary
  • What’s New in 12d Model 14 PDF
  • 12d Model 14 Reference manual PDF
  • 12d Model 14 Programming Language manual PDF
  • Getting Started for Design PDF
  • Getting Started for Surveying PDF

12d Model 14 also includes

  • GDA 2020 – MGA 2020
  • 12d Field Pickup – total rewrite and combined with Setout
  • 12d Field Setout

Can BIM be Civil ?

  • Can BIM be applied to Civil Infrastructure?
  • Can Civil BIM be implemented without cost blowouts in the design and construction phases?
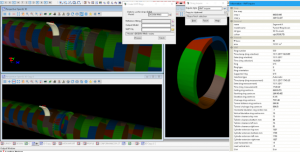
  • Creating trimeshes for pavements and roadside furniture
Introduction to 12d Model 14
Creating trimeshes from Tunnel Boring Machine (TBM) rings

12d Model 14 and Civil BIM

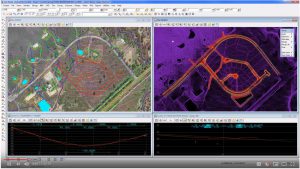
  • Large coordinates allowed – e.g. Eastings and Northings
  • Handles large and long horizontal projects
  • A Helix for arcs
  • Strings with and without diameters
  • Name/Code for strings – used in OZ and NZ since 80s
  • Null z values in strings
  • Drainage/Sewer pits and pipes
  • Tins for surfaces and trimeshes for 3D objects
  • Alignments
  • Linear referencing using Alignments
  • Transitions – spirals, cubic parabolas, NSW cubic parabola …
  • So yes, with 12d Model 14, BIM can be Civil!

12d View

  • 12d View is a FREE 12d Model project viewer.
  • 12d View can also read in data from a variety of sources
  • Just like 12d Model, 12d View has:
    • Plan, Section and Perspective views
    • Profiling on section views
    • Inquire options
    • Measure options.
  • 12d View can use:an existing 12d Model authorisationORan existing 12d View authorisationORrun unregistered

12d Synergy 3 and 12d Synergy 4

  • Latest versions support 12d Model 14.


All in all, a pretty action-packed introduction to 12d Model 14! Watch the video to see Lee’s full presentation!

New Webinar Series – Stormwater Drainage Design Fundamentals: Episode 1 – Project Preparation

Announcing…a new series of Training Webinars, to be run over the course of 2019, by Owen Thornton of 12d Queensland!

Owen has been writing software for 12d Solutions since 2003. He has a degree in Mechanical Engineering, a background in Computational Fluid Dynamics and 15 years professional experience in the civil and mining industries. He is the original author of the 12d Drainage Network Editor and the Drainage Analysis module, and a 12d specialist in drainage, utilities, plot parameter files, survey conformance, volumetrics, and system setup. Owen has recent consulting experience using  12d Model on a variety of large projects, to design: stormwater networks, industrial sites, landfills, dams, basins, channels, levees, access roads, rail sidings, car parks, building pads and retaining walls. These days, Owen also gives regular 12d training courses in drainage design and macro writing.

This new series of webinars – Stormwater Drainage Design Fundamentals – covers the basic and intermediate aspects of the Three Waters modules in 12d Model 14, with special emphasis on the design of stormwater drainage. It is presented as a condensed overview of the material normally covered in the first two days of the formal Three Waters training courses (W01 to W06) offered regularly by 12d Solutions. This material is assumed knowledge for many of the more advanced training courses available in the Three Waters suite.

A construction-ready drainage model – including catchments, pits, pipes, culverts, channels and flood extents – is created from scratch in 3D and designed for specified minor and major storm events using the Rational Method. Output plans, long-sections and calculation tables are also produced.

Episode 1 of the series – Project Preparation – was run on Wednesday 27th February 2019 – watch the video here. It details some of the preliminary steps required, before the drainage design can begin in earnest. Not all of these steps are mandatory, but they can certainly help to make the job easier.

Lot Pads (“Outside the Box”)

I caught up for a chat with Alisdair McCrudden of 12d Solutions WA, who first started using 12d Model – or, rather, 4d Model, as it was known then – in 1996! From 1997 he ran 12d Training courses through a reseller, and then in 1998 he commenced contracting directly to 12d, and has run our WA Support and Training ever since.

Alisdair shared some ways to think ‘outside the box’ with the Lot Pads options in 12d Model software. He informed me beforehand that whilst Peter Taynton has done some great videos (available on our 12d Model YouTube Channel) on these options…as is always the case with 12d Model, the tools can be used in ways other than they were originally intended!

In this great presentation, Alisdair takes us through some varying ideas to perhaps spur some thought on possible uses.

He examines the Lot Pads Create, The Lot Pads Edit, Dynamic Pad & Dynamic Pad/Pond options.

He also provided some ideas on:

  • Dynamically “floating” a Building Pad up & down to get a balance of earthworks quantities.
  • Grading a Parking Lot for drainage by selecting maximum & minimum grades to a gully via the “Level/Grade” option.
  • Creating a “plain” at a selected grade via the “Surface Grading” option.
  • Dynamically “float” a set of ponds + a surrounding edge platform, as 1 entity, up & down to get a balance of earthworks quantities.

Watch this great webinar video today!


–Lisa Stewart

Using a Drone

Surveyor of some 40 years and teacher at the Canberra Institute of Technology, Noel Burton of Detail Survey, addressed our 12d 2018 Technical Forum audience about using drones for surveying work.

Over his career, Noel said, he’s seen things progress from a non-technology type surveying right through to where we are at the moment, where he’s happily going out to use drones for most of his survey work.

The main focus of his talk was on using drones for those who don’t necessarily do so every day in the industry, to give a broad overview of what they can do.

What is a Drone?

A drone is currently known as a Remotely Piloted Aircraft (RPA).

Broadly speaking, there are two types of RPA – Fixed Wing and Multi Rotor. Fixed Wing RPAs fly like a plane whereas Multi Rotors will generally hover when you take your finger off the control.

Fixed Wings are the original RPAs used in surveying; they are traditionally launched from a catapult or manually propelled (thrown up in the air). These come with some issues, though – they require room to land, they’re quite expensive…and they’re apparently the favourite food of Wedge Tailed Eagles! Countless videos exist of these majestic birds taking exception to Fixed Wing RPAs, and while it’s quite funny to watch, it can also be a very expensive loss for anyone involved!

Multi Rotors, on the other hand, have been adopted more recently by surveyors, including Noel. Their popularity is down to a number of factors. They can take off and land vertically as well as hover, and they’re good not just for mapping but also for video and photo monitoring of structures such as power lines. They’re also quite inexpensive and easy to use, and their resolution and quality actually compare well even against some of the really expensive Fixed Wing RPAs. Oh, and as a sideline bonus, eagles, hawks and crows seem only amused by this strange ‘bird’ in their skies.

Rules for Using RPAs

The Civil Aviation Safety Authority (CASA) is the governing body for anything that flies in Australia. In the last couple of years, their rules have softened slightly. For instance, with Noel’s drone he can happily fly it and charge money for his services under their rules.

Their website lists the rules for flying RPAs – most are just common sense , but it’s important to know them anyway – Noel took us through some of the important ones. They cover things like only flying during the day, keeping the drone in your line of sight, not flying it above 120m, keeping it 30m away from other people, and never flying it near a bushfire zone. If a RPA is more than 100g in weight (which they pretty much all are), it needs to stay away from airports.

If you’re licenced as a drone pilot, you can apply to break some of the rules slightly. The corollary of this is that if you follow all the rules, you don’t need a licence according to CASA. However, Noel suggested talking to an insurance company as there could be liability issues if someone is injured by a drone, etc.

Planning Missions

Noel said that the first step to mission planning is to check whether you can fly a drone in your selected area – Google search ‘can I fly there?’ There are also phone apps available to assist with this. The result, either way, is that users can be notified of any restrictions in selected areas through use of an interactive map.

Noel’s next step is to get a surround. With a lot of the apps for flight planning, if you can create/receive a KML file of the extents of the proposed area for survey, you can use that as part of your flight planning. To get these, either use GoogleEarth yourself or get the file from the client.

After that, you can plan the locations for your Ground Control Points (GCPs) – i.e. the known points for being able to position the drone survey.

Some of the ‘fancier’ drones have accurate positioning in them so you don’t need GCPs, but with the more basic models, it is necessary to enter targets.

The spacing of the grid depends on how high you’re going to fly – if you’re going to fly high, you can have the lines further apart; if you’re flying lower to the ground, keep them closer together.

Once you’ve generated the KML file, we can bring it into an app that will run on the computer (or even an iPad). There are a few apps out there – Noel uses DroneDeploy. It does all the processing for you if you want to submit online; if you don’t want to do that it will design the flight plans for you and you can do the processing yourself (as Noel does – this method is free).

With this software, you can enter the height you want to fly, the forward and side overlap (sufficient overlap is necessary to create the 3D model), and the flight line directions.

Once you’ve generated the flight lines for the mission, you can calculate with the software how long the mission will take, the area you’ll cover, the number of photos, and the number of batteries you’ll use.

Noel showed footage of a mission that was completed using an iPad Mini and then simulated this mission live on screen for the audience, pointing out where the drone started taking the photos, and then what to do with those images/information.

Processing Data Gathered by RPAs

There are two main brands of processing software – Pix4D and Agisoft PhotoScan (now called Metashape). Noel uses Agisoft, which he says is fairly easy to use.

Agisoft – steps:

  • Adding photos
  • Deleting unwanted photos
  • Setting coordinate system
  • Aligning photos
  • Importing and referencing GCPs
  • Creating the point cloud
  • Filtering unwanted points
  • Creating mesh and imagery

Adding and filtering photos

The first step is to read in the photos taken by the drone and select the folder, then delete the ones you don’t want. You can then estimate the image quality – the program will go through to find the ones that aren’t high enough quality and get rid of those.

Aligning photos and referencing GCPs

The photos are in latitude, longitude and height, and we convert them to MGA coordinates (the local coordinates). This is useful because when you survey the points they’ll use MGA and you need to be able to import them into the actual job to be able to manipulate the images. Also, there’s an option to align photos – the program will try to match pixels on the photos to build a model so you can read in your GCPs and identify them on the photos. It’s just a simple CSV file. Noel just uses regular black and white tiles for this – positions each on the ground as reference points for the photos. This gives you an idea of residuals to increase accuracy.

Creating and filtering the Point Cloud

When the initial point cloud is generated, it includes everything; running the Classify Points option allows you to filter out items such as trees, which are placed in different layers.

Creating mesh and imagery

We generate the mesh from the point cloud (just the ground layers). When we get the triangles, we can then use Decimate Mesh to filter out areas that are within a certain tolerance. From there it’s just a matter of getting out the rest of the processing. Each day, Noel gets things to a point where he can run this option overnight – batch process to build up texture, create imagery, export points (e.g. LAS), create a GeoTIFF file for accurate imagery, generate reports, etc.

Deliverables

Noel showed a KMZ file that came out of the job he was demonstrating, commenting that he finds using a drone for a job so much simpler and quicker than previous methods – he greatly appreciates this technology for saving footwork and increasing efficiency. The work has lots of applications. Noel concluded by stating that every Surveyor should have a drone on the back of the car – it is such an important tool these days.

12d Modellers on 12d Model

It’s always exciting to see the innovative projects that 12d Model is being used for. From the Parramatta Light Rail from to the West Gate Tunnel down in Victoria, seeing 12d Model in action is always illuminating for us as it is for other industry professionals.

One of the most useful things is finding out what features drafters and designers value best. Here’s a roundup of some of the feedback we got, from the people actually using our software…


Seb Woodland, GHD

I like the Computators and the way we can form parametric designs and really get a lot of design intent into the model, rather than just a 3D drafting type exercise.

Lane Irwin, 12d NZ

In 12d Model 14 for surveyors, definitely the plotting is going to make things a lot quicker and a lot easier. With the new 12d Field formats, just having a tree format will be absolutely fantastic, as well as more CAD options and things like that.

Carly Smith, Alexander Symonds

Personally, I love Visualisation. I used 12d Model a lot for a wind farm project, so we were able to plot out the turbines and then optimise the area and put in the roads, and it was great to fly through and see that all in visual.

Peter Murray, Brisbane City Council

I’ll go across all of the features, but the survey stuff is where I’m based. The new 12d Field is what I’m particularly interested in at the moment.

Dean Ostrofski, City of Gold Coast

Probably, the biggest benefit is the way 12d Model interfaces with a survey to design, then back to survey for construction set out, and now with the BIM capabilities, it’s fantastic. Visualisation has always been there, which is tremendous in being able to show our clients what we’re doing at an early concept stage before we go into the details.

Derek Roberts, Calibre

It’s probably starting to focus, the biggest one. There is probably the one point of truth. A lot more people are using it as a preferred software package, so it’s made it a lot easier to handle things and make changes and integrate with other software through common procedures.

Phil Weightman, Byrne Consultants

One of the features I particularly like is that everything keeps evolving within 12d. So that’s one of the great things, but I love how it’s starting to move into some of the object-oriented design space and how it’s keeping pace with the industry and also almost being on the leading edge of industry as well.


One thing we are certainly committed to at 12d is continually evolving and improving all of our software, to meet and exceed industry needs.

Going forward, we think the new user defined menus are going to be a game changer. There’ll be a nightmare for our support people because they won’t know what they’re going to be dealing with!  But I think a lot of users want to be able to customise 12d Model and chop it down for different applications.  We’ll still ship it with everything, but they can then define their own menus, top menu, side menu.

Ultimately, the future is shaped by our users coming and saying what they need that will make their life better. It might be some great big thing.  But it’s often the incremental changes that make the difference, such as cutting a task time from ten hours to one hour.


The Attribute Manipulator in 12d Model

Paul Hardwick of 12d Queensland addressed our 2018 Technical Forum audience about the Attribute Manipulator in 12d Model software.

Paul said this option has progressed a lot since 12d Model 11, and it has filled the hole of a lot a macros that have been written in the past, combining them all into one nice, easy-to-use option. It continues to grow in response to customer requests – expanding as more people want attributes, and more people want to do more things with attributes.

He showed examples of some attributes that can be easily worked with using this feature of 12d Model, declaring that, “It’s a very handy tool for a lot of different things.”

Updates to the Attribute Manipulator in 12d Model 14

New Rule Type Menu

The names of the items on the Rule Type pop-up menu have been modified as many items now apply to more than just string elements. The new names should make it more obvious which elements the rule will work for.

Str/Tin/TRm Attribute Menu

The Attribute Rule has been replaced by the Str/Tin/Trm Attribute Rule as the option now works for String, Tin, and Trimesh attributes.

New Choices for what Happens to Attributes

• Set the attribute path name to all upper case
• Set the attribute path name to all lower case
• Set the attribute to the GUID for that place and time

New String/Tin/Trm Properties

• Time the element was created
• Time the element was last updated
• Colour of a Trimesh
• Surface area of a Trimesh (all sides)
• Volume of a closed Trimesh
• Justification point of super string pipes

New Vertex Properties

• Colour of the water string node
• Modify the X, Y, and Z values
• Modify Point IDs

New Segment Properties include line style of a segment.

Concatenate Attributes

A real time-saver. For packages that can’t handle attributes, this gives the ability to concatenate attributes down to one thing, e.g. string name.


All in all, the Attribute Manipulator is an exciting feature in 12d Model that continues to grow, saving users time and money! Watch the full video of Paul’s presentation for more information!

Public Works Standards

Tim Brooks (and Owen Thornton) of 12d Queensland addressed our 12d Technical Forum 2018 audience about Public Works Standards.

Tim is the 12d Model and 12d Synergy Training Manager, and has been with 12d Solutions for around 5 years. He coordinates and writes 12d Model training manuals, and writes the 12d Synergy Training manuals. A Civil Designer with 20 years’ experience in the Civil industry both around Australia and in the UAE, Tim has worked on a variety of civil projects including Motorways, Highways, local roads, Industrial and Subdivision estates, Carparks and Rail projects.

Changes Coming to 12d Model 14 setup and Library files

Those who were around for the previews of 12d Model 11 (at the 2014 Conference) may recall that 12d did a lot of work on the files that were shipped with that version.

As part of an initiative by the IPWEAQ, in conjunction with 12d, all those files have now been developed further, to form what we are calling the Public Works Standards.

Towards the end of 2016, 12d (represented by Tim) started meeting with the IPWEAQ Councils and assist in making their dream of a common standard become a reality.

The IPWEAQ had been meeting before this, but hadn’t ventured into the actual customisation too much other than their own councils having their own methods, and sharing these with each other.

There are two main groups in operation – one for Survey and one for Design/CAD.

The biggest item discussed at these meetings was the names.4d file, as well as the string coding and model naming within it. From there, attendees went through what was required for outputs – for DWG, what the plotting of long- and cross-sections should look like, etc. All these items came together either by councils submitting their own examples or 12d providing examples and getting feedback.

Standards/codes have been kept generic to suit all locations. There has been positive feedback so far – we’re starting to get people using this in other states, and in New Zealand. The pursuit of a common standard seems less of a far-off dream than it once did! Tim even had an article published in the IPWEA magazine last year – ‘Creating a Common CAD Standard’.

So why do this?

Tim asked the audience…who here develops 12d Model standards for own company? Many answered that they did. He went on to ask such questions as:

Who has time to maintain those standards?

Who has the budget to maintain them?

Who actually likes developing these files?

And determined that this task is difficult and time-consuming for most of those charged with it, and that a better way forward is desired. In fact, some companies don’t even have a 12d Champion to develop these files, so they’re in even greater need of this. This is particularly prominent when there are issues with different requirements for projects that span over different authority borders – whose standards are used then? Something has to change. Enter 12d.

New Public Works Standards in 12d Model 14

All these new standards will come with 12d Model 14, out of the box:

  • Setup Files
  • Names.4d
  • Colours.4d
  • Linestyles
  • Symbols
  • Defaults
  • Plotter
  • Plotter map files
  • Library Files
  • CAD dwt and acadmf
  • PPFs and associated files
  • Various mapfiles, macros, etc.

The Survey and Design/CAD groups will continue to meet into the future and agree on any additions/changes to keep this process improving.

Using the new Standards in 12d Model 12

If you wish to use these standards in 12d Model 12, there’s now a location on the 12d Model User Forum so you can download these put them in your 12d Model 12 user folders.

Providing Feedback

Users can provide comments on the User Forum (but any changes will go through the Survey and Design/CAD groups for final approval).

Future Directions

There are still some more files to be added.

For Survey – Tim, along with Paul Hardwick (also of 12d Queensland), have been working with councils in Queensland to update survey mapping files, macro to transfer to 12d Field Codes, label mapfiles, 12d Field codes, and style sheets for post processing.

For Design – we’re also looking at updating the Snippet template library to include template snippets that match the IPWEA standards.

Documentation for Public Works Standards

This is being worked on currently and should be available in the near future. Documentation will include:

Survey manuals/procedures

CAD/Design manuals/procedures

We’ll upload them to the 12d Model User Forum when they’re available. Also, the IPWEAQ should be making them available through their website.

Public Works Standards – Plots

Owen Thornton has a keen interest in the Plot Parameter File (PPF) development in 12d Model. His section of the presentation focussed on new Plot Parameter Files and new PPF Features in 12d Model 12 and 12d Model 14.

Owen has been writing software for 12d Solutions since 2003. He has 20 years’ professional experience in the civil and mining industries. He is the original author of the 12d’s Drainage Network Editor and the Drainage Analysis module and is a 12d specialist in drainage, utilities, plot parameter files, survey conformance, volumetrics and system setup. Owen also has consulting experience using 12d Model on a variety of design and drainage projects, large and small. These days, Owen runs regular 12d training courses in drainage design, geometric design for water resources, customisation and macro writing.

He provided a ‘highlight reel’ about the particular part of the Public Works Standards that covers PPFs, and also some new PPF features for both 12d Model 14 and 12d Model 12.

PPFs for Public Works are already installed in 12d Model 12, and Owen said the new features in 12d Model 12 are working very well.

The extent of Public Works PPFs is long- and cross-sections for roads, as well as long-sections for pipeline and drainage/sewer.

Out of all the PPFs installed with 12d Model, the ones that are new to 12d Model 12 and 12d Model 14 were highlighted in Owen’s talk – he said the files with ‘PW’ in their names are associated with the  Public Works Standards.

Staggered Uprights for Cuts Labels

Owen’s favourite of the new features. For every PPF that has a Cuts branch, there’s a new position mode called ‘Above top of boxes staggered’. With this, Cuts annotations may now be positioned with staggered uprights that extend down into the boxes area.

All the new ‘PW services’ PPFs have a dedicated space on the plot for this service and utility data.

This means no more clashing text! We’ve ‘Banished the Drafting Demon’ here.

Staggered Uprights for Cross-section Points

Similarly, for cross section plots, Staggered Uprights now exist.

Design string names at cross-section points may also now be positioned with staggered uprights that extend down into the boxes area.

Long-section Super-elevation Diagram

Greatly improved yet simplified, with new mode and super rotation rate tolerance – a parameter related to the design of the road; users can work out and pick a number that suits the kind of super elevation applied to the road, in order to pick out the flat spots in the diagram for labelling. Users can also label chainages at zero xfall.

Feedback on this has been very positive so far.

Long-section Datum Shifting

  • Automatic datum shifting controlled from the Graph area branch
  • Extra space parameters have also been enhanced
  • Parameters for deciding when it can break the datum.

Public Works Standard Drainage and Sewer Long-sections

This one is quite specific to Queensland, but if users don’t have any standard to use, this could be used as a basis.

We submitted all these for review by the IPWEAQ – we got feedback and modified some parts slightly, but essentially we’re all on same page.

Public Works Standards in 12d Model 14 only

  • “Black Pen” colours sorted by PMF Pen Weight
  • This is new in 12d Model 14
  • “Black pen” screen colours have been coordinated across colour groups
  • Owen has created a handy reference for use while getting used to the new arrangement
  • Hard to implement but worth the effort.

New plotters and Plotter mapping files have been included in 12d Model 14, to meet the Public Works standard.

We haven’t gotten rid of the old ones that worked well to a different standard – they’re just grouped under Legacy now.

Other New items in 12d Model 14

  • SUI (Subsurface Utility Information) colours
  • Raster overlay colours
  • Contour colours for black screens and white paper/PDFs.


Watch the full video today to see more of what was presented on this topic!

Drainage and Object 3D Clash Detection in 12d Model

Recently, we replayed another of our most popular webinars from 2018, ‘Drainage and Object 3D Clash Detection in 12d Model’. This session was presented by Dylan Revell of 12d NZ.

Not only does 12d Model allow its users to create comprehensive 3D and BIM Models of surveys, road designs and water modelling, it also provides tools for users to analyse and check the effect of these models spatially against one another.

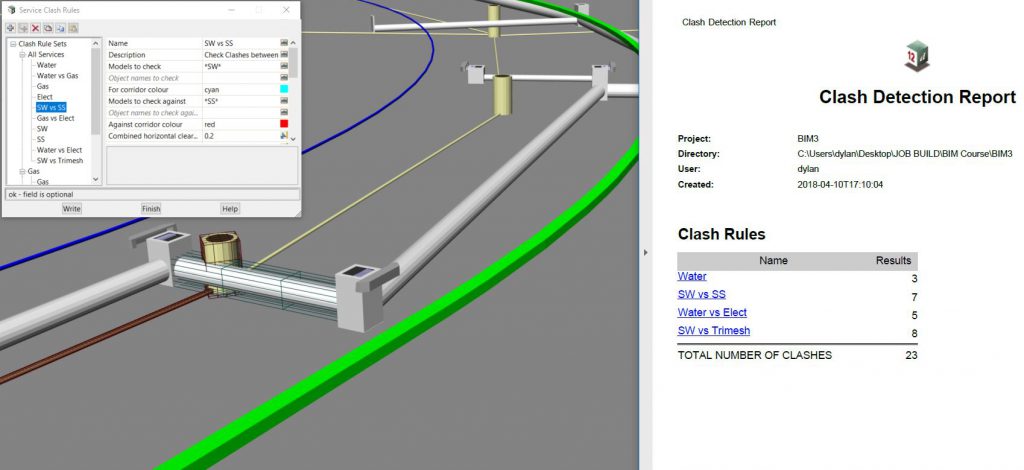
This webinar will cover tools for users to visually identify, report, and process 3D model interference or ‘clash’ occurrences for tins, strings, and trimesh objects.

Please note that this will be a live replay of a very popular webinar held in June; attendees will be welcome to ask questions during the presentation and these will be responded to by email after it finishes.

Watch the video now to hear more about this great topic!

Precise Culvert Length and Location with Drainage Strings

We started off this year’s 12d Training Webinar Series with a replay of an extremely popular topic from May – ‘Precise Culvert Length and Location with Drainage Strings’. This topic was presented by Owen Thornton of 12d Queensland.

This session demonstrates how to align and grade a Drainage string culvert with precision, in both the horizontal and vertical, to best suit the batter slope of the road it crosses and to allow for an integer number of pre-fabricated pipe/box lengths.

Plan and long-section plots of the culvert are produced. The culvert and its headwalls are also converted to trimeshes, for use beyond hydraulic modelling, e.g. road design and BIM.

To see this in action, watch the video today!

12d International Technical Forum 2018 – Thoughts by Lee!

The 12d 2018 Technical Forum was a wonderful way to crown a record-breaking year for 12d Solutions. We had well over 500 industry professionals from survey, construction and design, and data management join us. All the seats were taken up – we were literally bulging at the seams, with standing room only.

It’s always fantastic to see the innovative ways that customers use our products. They often find applications that we had never thought of. We see people using certain features over and over again: features which even the developers had never imagined being that important.

Getting to grips with BIM

BIM was the major discussion topic at this year’s conference. The majority of presentations addressed how different companies are dealing with BIM, especially from the civil engineering point of view. Most AEC professionals have had it rammed down their throats about vertical BIM and buildings. But now they’ve really shown how they know what civil BIM is all about, and how Australia is leading the way because most people aren’t doing it around the world.

We’ve seen fantastic projects where everything’s been done inside 12d Model, modelling everything, federated models, clash detection, the whole lock, stock and barrel. So people from all over the world are coming to Australia to take a look and see what our users are doing here.

As Richard Russell from Arcadis put it: “You don’t have to be a 12d user to come here and get value from the conference. Currently in the industry there’s a lot of talk about BIM and where BIM is going, and a lot of misinformation out there. The 12d Technical Forum is a really good place to properly understand what the software is capable of, and what’s been done for years already. We’re not trying to reinvent the wheel.”

Fast-growing 12d community

2018 has seen record sales of 12d Model, as well as record numbers of people coming to training. 12d Synergy also enjoyed a record year, boosted by the arrival of version 4 with its enhanced CAD management features. Since 2016, 12d Synergy has experienced a 300% increase in users.

Many of our customers report that the new versions of 12d Model and 12d Synergy are changing the way they work – for the better! Whether it’s enabling civil designers to work flexibly.

As we grow as a company and as a user community, there’s more and more surface area and more things we can move into. The more we do, the more people realise what else they can automate. It’s really our customers who are driving what is important – after all, they’re the ones out there doing road design. We don’t design roads ourselves at 12d.

That’s why the 12d Technical Forums are so great, because we get to see exactly what our users want. They can interact with us, talk to our programmers, talk to our sales and support people and that’s telling us where the future’s going to be.

Getting user feedback is critical for how we develop products in future, and understanding how they’re using our software and what works best for them.


–Dr Lee Gregory – Managing Director, 12d Solutions Pty Ltd