The Tipster: Setting Up Dongles.4d File

In this short but important tutorial, we explain how 12d Model accesses licenses using CodeMeter dongles and how a simple configuration file can help the software locate a valid license.

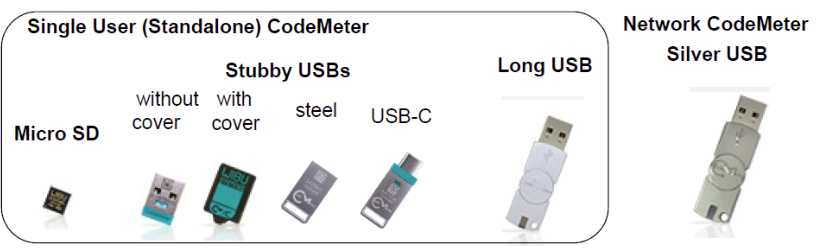
Whether you’re using a standalone dongle connected directly to your workstation or a network dongle shared across multiple users, understanding how 12d Model searches for licenses can help prevent setup issues and save troubleshooting time.

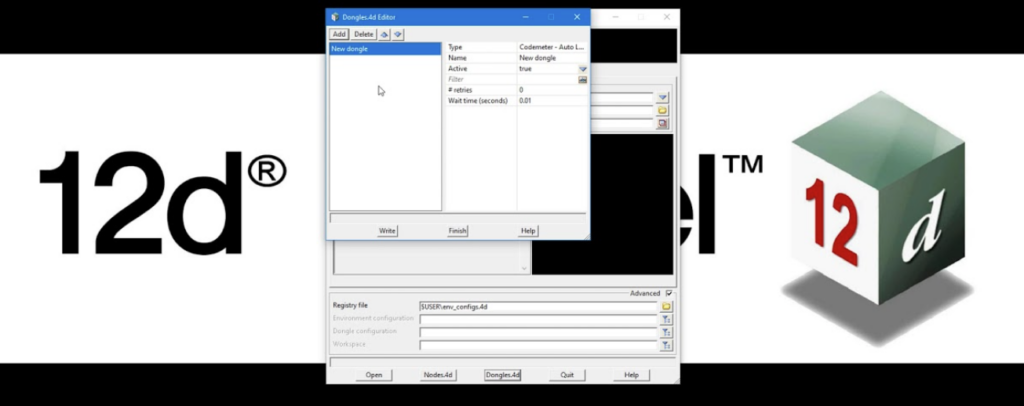
You’ll also learn about the dongles.4D file, which controls where 12d Model looks for a license and in what order. While standalone users typically won’t need to modify this file, it plays an important role in networked environments.

Watch the full video for a clear walkthrough of dongle-based licensing and learn how to ensure your 12d Model installation is configured correctly from the start.

The Tipster: Installing Dongle Drivers 

Before installing 12d Model, it’s helpful to understand how its licensing system works. This video gives you a clear and simple explanation of the different dongle types you may receive after purchasing your license.

Upon purchasing a 12d Model licence or licences, you’ll usually receive: a standalone Codemeter or a network Codemeter dongle (or both).

Standalone dongles come in several forms such as an SSD card, a stubby USB, or a long USB drive. While they may look different, they all serve the same purpose. These are designed for individual users and allow access to multiple projects, with the option to be shared when needed.

For team environments, a network dongle is used instead. This is typically a heavier metallic USB device, where each licence allows one user to access a project at a time, making it suitable for shared organisational use.

By the end of this video, you’ll have a clear understanding of how each dongle type works and which one applies to your setup.

Watch the full video to get a simple, visual guide to 12d Model dongle types and licensing.