
History Files: Field File Reformatting – Queensland Rail (QR)

Manual entry of traverse data into the Least Squares Dialogue can be time-consuming and, when calculations are involved, can introduce the risk of human error. To address this challenge, Queensland Rail (QR) developed a utility to streamline the process by automatically extracting observations from a field file and generating the required Horizontal and Vertical Least Squares input files.

The utility also helps keep field files clean and manageable by reformatting attribute data, assigning the correct data identifiers, and removing unpopulated attributes. By automating these tasks, the workflow reduces manual effort and screen clutter while improving efficiency and consistency throughout the survey processing process.

The team at Queensland Rail (QR) had the idea to develop a tool that would create input files to be read by the horizontal and vertical least squares dialogues in 12d Model software. The program would read a field file and extract all the observations to the control points and write the data out to the *.in and *.lin text files. This would save a lot of time compared to manual entry, and remove human error. The files could be read into the Least Squares dialogues and processed.

The manual input of traverse data into the Least Squares Dialogue in 12d Model can be prone to user error when manual calculations are involved. As a response, QR set out to develop a utility that creates a Horizontal Least Squares Input and Vertical Least Squares Input files from the field file. The Horizontal Least Squares Input file was to have the extension YourFileName.in. The Vertical Least Squares Input file was to have the extension YourFileName.lin. The files were to be saved to the same location as YourFileName.fld.

The attribute reformat was written at the same time that the 12d Attribute Macro was developed. At that time, the Macro only removed the white space 73 lines, not the unpopulated attribute. Hence the functionality was included in this tool.

To enable the proper use of the attributes attached to a given observation code, the attribute had to be given its correct attribute type. The line identifier in the field file is used to determine the data type and therefore the way 12d Model can handle the attribute. With the QR Code library set up for generic use, the reality is that the majority of feature codes will not have a populated attribute attached to an observation code in every instance.

The created tool reads the field file and interrogates each code attribute and reassigns the correct data identifier to the attribute and deletes any unpopulated attributes.

This utility reformats the field file attribute data and removes all unpopulated attributes with the goal of only displaying useful information instead of empty descriptors in the project.

The tool developed reads a field file and extracts all the observations to the control points and writes the data out to the *.in and *.lin text files. The files are read into the least squares dialogs and processed. The control model created is then used in the field file reduction to control the processed observations. Screen clutter is reduced, and efficiency increased—saving time and money.

Download this Case Study as a PDF HERE.
SPOT Training: BIM – 12d Model 15

Take your 12d Model skills further with our 12d Model 15 BIM Course, designed for users who want to develop practical BIM workflows and create flexible, information-rich models that support modern project requirements.

For only $200 AUD excl. GST, you’ll get access to 6 hours and 19 minutes of self-paced video training, allowing you to work through the lessons at your own pace with structured guidance and practical exercises.

What You’ll Get

Your enrolment includes everything you need to work through the course, including:
Certificate of Completion upon successfully completing the course
-12d Model 15 software licence and course data
– A 12d Model 15 Cloud licence provided free for three months
20 online video lessons
– Practical and engaging quizzes
12 months’ access to the SPOT video lessons

If you’re taking the course simply to practise and improve your 12d Model skills, certification is optional.

The BIM course builds on the concepts introduced in 12d Model 15 – Getting Started for Utility Modelling, particularly object creation and attribution, which form an important foundation for many BIM workflows.

Completing the Getting Started for Utility Modelling course is recommended before beginning this course. The course is available free with SPOT and is also included when registering for the BIM course.

What Will You Learn?

Throughout the course, you’ll explore a range of advanced BIM-driven workflows in 12d Model, with a strong focus on object creation, attribute management, automation and data coordination.

BIM Object Creation and Application

Learn how to create and apply a variety of BIM objects, including:

  • Fences
  • Trenching
  • Guardrails
  • Linemarking
  • Handrails
  • Traffic lights

Water Strings and Data Export

Explore water strings and their associated workflows, including:

  • Attribution
  • Exporting to IFC
  • Converting to super strings and trimeshes

Clash Detection

Develop practical skills in identifying potential conflicts within your model by:

  • Creating new clash rules
  • Running clash detection between super strings, trimeshes and TINs

Signage

Learn how to work with signage data by:

  • Creating signage from survey data
  • Creating your own signs

MetaConnex

Explore the capabilities of MetaConnex, including:

  • MetaConnex Function Calls
  • MetaConnex with Custom Attributes
  • Practical MetaConnex examples
  • Attribute validation

Pavements

The course also covers BIM-driven pavement workflows, including:

  • Attribute management
  • Pavement creation using the MTF
  • Creating pavements from TINs
  • Creating subgrade TINs from trimeshes

Flexible, Self-Paced Learning

This is a Self-Paced Online Training course, giving you the flexibility to learn when and where it suits you. With more than six hours of on-demand video content, you can pause, revisit and practise each workflow as you progress.

For the best learning experience, dual monitors are recommended—use one screen to follow the training videos and the other to complete the course exercises. Alternatively, you can use a second computer.

All you need is a reliable internet connection and access to the provided 12d Model 15 Cloud licence.

Certificate of Completion

Students who successfully complete the course can receive a Certificate of Completion. The certificate is designed to encourage students to work through the full course and does not include a grade or specify a number of credit hours that could influence employment or promotions.

If you’re completing the course purely to strengthen your 12d Model skills, you can choose to undertake the training without pursuing certification.

Start Developing Your BIM Skills

Whether you’re looking to strengthen your existing 12d Model knowledge or develop more advanced BIM workflows, this course provides practical training in creating, attributing, coordinating and managing information-rich project data.

Enroll in the complete course for only $200 AUD excl. GST and work through the training at your own pace with access to the course content for 12 months.

Enroll here today: Civil and Surveying Institute. Self-Paced: BIM – 12d Model 15[Limited Time Offer]

The Tipster: Master Shares V15

Master Shares in 12d Model 15 provide a convenient way to share and synchronise models and TINs across multiple projects. They allow you to create a central Master Share file containing selected project data, subscribe other projects to that file, and keep shared data consistent without having to manually copy files between projects.

In this guide, we’ll walk through the process of creating a Master Share file, adding models and TINs from multiple projects, subscribing a project to a Master Share, and finally unsubscribing or binding shared data into a project. Whether you’re sharing data from a single project or bringing together information from several projects, Master Shares provide a simple and efficient way to manage shared project data.

Watch the video here:

SPOT Training: Pavements – 12d Model 15

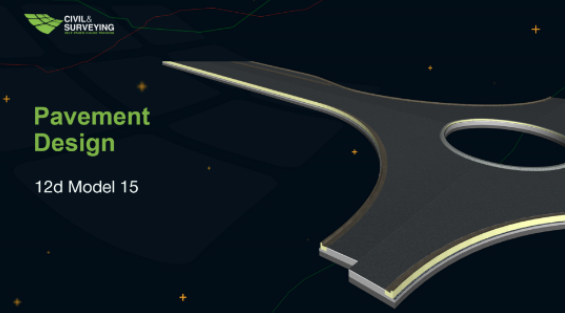
Take the next step in your 12d Model learning journey with this flexible, self-paced online training course. For just $150, you’ll gain access to 5 hours and 17 minutes of professionally structured video training, designed to help you develop practical skills and confidence at your own pace. Whether you’re looking to build foundational knowledge or expand your existing capabilities, this course allows you to learn when it suits you, revisit lessons as needed, and progress through the material on a schedule that works for you. Upon completion, you’ll also have the opportunity to receive a Certificate of Completion, providing formal recognition of your achievement.

As a part of your course, you will access:

– 12d Model 15 licence for 3 months
– 28 tailored video lessons
– Full lifetime access to the 12d Model training content
– Practical and engaging quizzes
– Certificate of Completion

Requirements:

– Dual monitors are recommended (follow the videos on one and do the course work on the other)
– Alternatively, use a second computer
– Internet Connection
– 12d Model v15 (download link provided with this course)

Prerequisites: It is recommended that either the Civil Design Features or Survey Construction Procedures course is completed before registering for this course.

Enroll today: Civil and Surveying Institute. Self-Paced: Pavements – 12d Model 15

The Tipster: 12d Model New Projection Panel

Upgrading to 12d Model 15 brings an important change to how cartographic projections are managed.

In this video, we take a closer look at the new 12d Carto file and what this means for users working with their own projection files.

You’ll learn:

  • How to convert your existing .4d Carto file to the new 12d Carto format
  • How shipped projections are now carried through from the standard 12d Carto file
  • What you need to consider when selecting projections from the new file
  • How to add your own projections while avoiding unnecessary duplication
  • Why the new XML-based format makes it easier to introduce additional fields in future versions

While the change may require a little adjustment when upgrading, the new approach is designed to simplify future upgrades and make managing projections more efficient.

Watch the video to understand what’s changed in 12d Model 15 and how you can prepare your existing projection setup.

SPOT Training: 12d Track – 12d Model 15

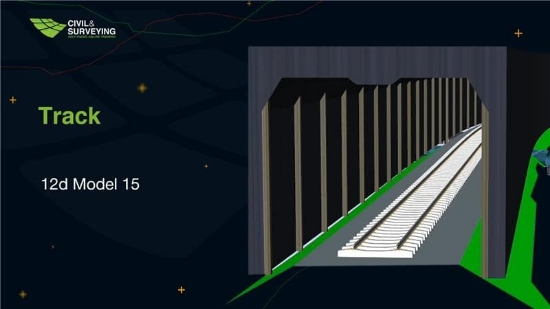
Build practical rail design skills with 12d Model 15 through the Self-Paced 12d Track Course.

At AUD $250 (excl. GST), this course provides 4 hours and 30 minutes of on-demand training across 26 focused video lessons, giving you the flexibility to work through the material at a pace that suits you.

The training takes you through key rail design workflows in 12d Model, from track alignment and centreline generation through to mainline and passing loop design, track slew assessment, chainage equalities, structural clearances and rail cant calculations.

You’ll also develop skills in modelling a range of rail infrastructure and physical assets, including rail formations, level crossings, turnouts, culverts, rails, sleepers and ballast.

Your enrolment includes:

  • 3-month 12d Model 15 licence
  • 26 tailored video lessons
  • Practical quizzes
  • Lifetime access to course content
  • Certificate of Completion

The course is suitable for 12d Model users who want to expand their rail design capabilities, with prior knowledge of rail terminology and design helpful but not required.

Learn through practical, structured training and develop the skills to confidently apply rail design workflows in 12d Model 15.

Enrol today: https://www.civilandsurveying.com/self-paced-12d-track-12d-model-15

History Files: The changing face of NZ surveying – Tomlinson and Carruthers Surveyors Ltd

For more than 55 years, Tomlinson and Carruthers Surveyors Ltd has delivered surveying and engineering services throughout the Wairarapa region of New Zealand. As the firm expanded beyond its traditional cadastral surveying roots into more complex engineering and subdivision projects, it sought efficient workflows that could keep pace with evolving industry demands. On a recent Local District Council subdivision and road vesting project in Masterton, Surveyor Derek Roberts and the team leveraged 12d Model to manage every stage of the project—from cadastral data creation and design through to GPS survey preparation, drafting, and final plan production. By combining 12d Model with GPS technology, the team significantly reduced field and office time, streamlined workflows, and improved accuracy, demonstrating how modern surveying practices can deliver substantial productivity gains on real-world projects.

Surveyor Derek Roberts said, “I think the engineering design work we’re now doing is increasing due to a buoyant and expanding industry, combined with new staff and a new curriculum in the New Zealand Surveying degree that has covered changing technology such as using 12d Model and GPS.”

“For example, 12d Model was used extensively on a recent project in the northern end of Masterton, near a big roundabout on the way out of town. The land concerned is known as ‘the horseshoe’, which was part of a significant local car park.”

“The project started as a straightforward two-lot subdivision to provide a council-owned car park with the balance remaining in private ownership. On closer inspection it was found that a larger than normal percentage of the land was actually being utilised as road. To formalise the situation these areas were vested as road in the ownership of the Local District Council. The back of the footpath was used to define the inside lot boundary with the outside being the existing Certificate of Title boundary (road carriageway). In conjunction with this, to the south-west there is part of a river with an open stream flowing through the area. The stream actually forms a natural boundary which we picked up to be compared with the underlying data in preparation for a future project.”

“We did absolutely everything in 12d Model for this job, including creating all cadastral data, design, CAD and plotting. We started by creating our scheme plan (plan of proposal) in 12d which was plotted out and used as part of the application, and then survey pre-calcs were completed within 12d before visiting the site. This information was uploaded into the GPS unit directly from 12d, so when on site we were able to walk directly onto these marks via coordinates rather than having to use conventional methods. This in particular has meant a huge saving in time and also given us a different approach to the majority of our jobs.”

“The information gathered by GPS and also conventional instruments was then downloaded into 12d Model. This data was used to form the basis of the 12d traverse spread sheets through which the majority of the linework for the title and survey plans was prepared and submitted on A2 litho paper. As this project was done using GPS, we also had to use the transformation functions to work out and apply the appropriate scale factors. Using GPS combined with 12d Model’s interface for processing pre- and postdata has probably halved the time required on site. A project of this nature would take approximately two weeks’ worth of work spread over the different stages, including about three days in the field and five days’ worth of calculations and drafting. This is phenomenal compared with the time it would have taken using conventional methods!”

“For Tomlinson and Carruthers, the major benefits of using 12d on this and similar projects have come from the 12d traverse spread sheet – in particular the way it does all the line work, point symbols and annotation of the plan all at once. This has the advantage over other software because 12d is able to calculate and annotate the true information rather than just the projected information.”

“Once the information is in the 12d traverse spread sheet, the drafting is done automatically. This means the potential for human error – which occurs mainly with reading and writing at the different stages – is kept to a minimum while the whole process is simplified and sped up. We are finding that using 12d Model in conjunction with GPS is saving us around 30-50% of our time spent on this and other projects. 12d’s ability to reduce errors has served us well, particularly with the use of GPS and electronic data recorders. Though you can never beat independent checks, the Traverse Spread Sheet Drafting has removed one of the more difficult areas to police.”

“Luckily, we have found that the training curve for 12d is very small, even for those with minimal CAD experience. For new users of 12d, probably half the learning time has been spent gaining an understanding of survey calculation methods rather than of 12d itself. Ease of learning was particularly facilitated by the ability to set up default files and screens to standardise procedures throughout the office and the whole firm.”

“Being a former SDR Map user, I found the 12d traverse spread sheet very appealing and easy to use overall. 12d has really revolutionised our methods and our approach to the majority of our projects!”

Download this Case Study as a PDF HERE

SPOT Training: Survey Construction – 12d Model 15

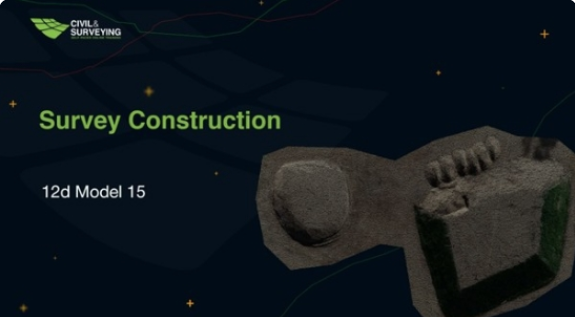
Enroll in the complete course today for just $225 (Introductory Offer) and gain access to comprehensive, self-paced training designed to help you build practical skills and confidence in 12d Model. Learn whenever and wherever it suits you with professionally structured video lessons, supported by dedicated email assistance from experienced trainers when you need it.

To receive professional certification, please ensure that the first and family names used for registration exactly match the names on your official ID. Certification requires successful completion of the course knowledge quiz. If you are undertaking the course solely for practice with 12d Model, certification is optional.

As a part of your course, you will access:

• 12d Model 15 Software licence for 3 months, and data
• 36 online video lessons
• Knowledge Quiz (for those seeking professional certification)
• Certificate of Completion
• 12 months’ access to the SPOT video lessons

Requirements:

• Dual monitors are recommended – follow the videos on one and complete course work on the other. Alternatively, a second computer can be used.
• Internet connection
• 12d Model 15 (a 12d Model 15 Cloud licence will be provided free of charge for six months. Egress to Port 22350 is required to access the Cloud licence).

Prerequisites: 

Completion of the Survey Basics or Getting Started for Surveying course (available for free with SPOT) is recommended.

Enroll today: Civil and Surveying Institute. Self-Paced: Survey Construction – 12d Model 15

The tipster: Configuring Env_configs.4d – Dongles

As your 12d Model customisation grows, managing multiple licenses and environment configurations can become increasingly complex. In this video, we introduce a more efficient way to handle license selection by using the Dongle Configuration feature within the Environment Configurations file. Rather than maintaining separate dongles.4d files for each modelling purpose, you can store your license information directly within the configuration file, creating a cleaner and more streamlined setup.

Throughout the tutorial, you’ll learn how to create and manage dongle entries, understand the relationship between dongles and nodes files, and determine when a single environment configuration may be sufficient for your workflows. We also cover situations where separate environments and variable overrides may still be beneficial. Whether you’re setting up a new customisation framework or refining an existing one, this video provides practical guidance to help reduce administration, simplify maintenance, and make managing licenses in 12d Model more straightforward.

Watch the video here:

SPOT Training: 12d Model 15 Snippets

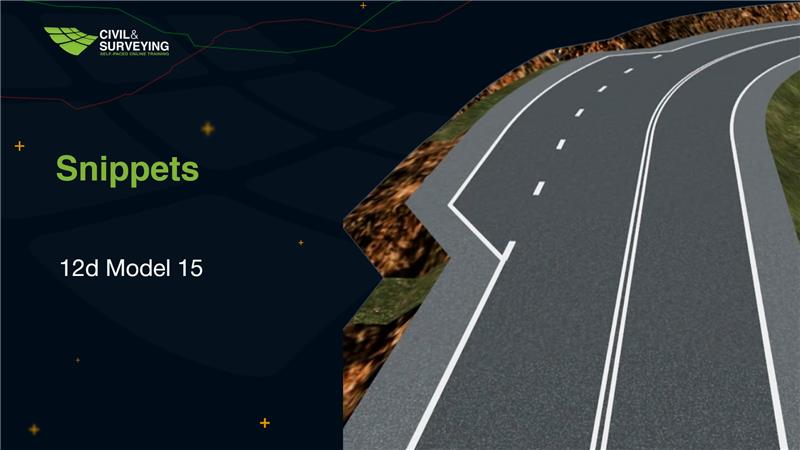
Take your 12d Model skills to the next level with this self-paced online course, designed to fit around your schedule. With 2 hours and 50 minutes of on-demand training, you can learn whenever it suits you and revisit the content whenever you need.

What’s Included

As part of your enrolment, you’ll receive:

  • 25 expertly guided video lessons
  • 2 hours 50 minutes of on-demand training
  • A 12d Model 15 licence valid for 3 months
  • Lifetime access to all course videos and training materials
  • Interactive quizzes to reinforce your learning
  • A Certificate of Completion upon successfully meeting the course requirements

Learn at Your Own Pace

This is a Self-Paced Online Training (SPOT) course, giving you the flexibility to study whenever and wherever it suits you, while progressing through the material at your own speed.

Earn a Professional Certificate

Successfully complete the course requirements to automatically receive a Certificate of Completion. If you’re simply taking the course to build your 12d Model skills, certification is entirely optional.

Course Requirements

To get the best learning experience, we recommend:

  • Two monitors (so you can watch the lessons on one screen while practising on the other), or a second computer
  • A reliable internet connection
  • 12d Model v15 (download link provided after enrolment)

Prerequisites

This course is suitable for all 12d Model users, whether you’re just getting started or looking to improve your workflow.

To maximise your learning experience, we recommend:

  • A basic understanding of the MTF.
  • Completing the Civil Design Basics V15 course for a strong foundation (recommended but not required).
  • No programming experience is necessary. If you’re familiar with simple Excel formulas such as IF statements, you’ll quickly understand the concepts covered in this course.

12d Model Licence and Loan Agreement

Your enrolment includes access to a 3-month 12d Model 15 training licence, provided under the terms of the 12d Model Licence and Loan Agreement.

Enroll Today – Only $200!